Prevent your e-mail from getting into the spam folder with SPF

SPF stands for Sender Policy Framework and is a protocol that determines whether the sender of an email is authorized to send messages from a specific mail server. The main purpose of SPF records is to prevent spam, but more importantly for you:

The SPF record informs other internet services that your email truly originates from your website, preventing your emails from being filtered into the spam folder!

Where can you add the SPF record?

dns example

You need to add the SPF record at your web host. When registering your domain name, you should have received login credentials from your web host that allow you to modify the DNS settings of your domain name.

The structure of an SPF record

First, you need to indicate that the record is an SPF record by adding the following:

v=spf1
This tells the DNS which version of SPF you are using, which is important for reading the SPF record.

Next, you specify when an SPF is valid:

all for all outgoing mail servers.
a If the sender’s IP address matches the IP address (A record) of the domain.
mx When the mx record matches the SPF address.
ip4 & ip6 When the mail is sent, it is transmitted via IP addresses (of your domain).

Okay, there are many possibilities, what is common?

v=spf1 a mx ptr ip4:123.456.789.000 mx:yourdomain.com include:_spf.google.com include:_spf.hotmail.com ~all

Note: Choose TXT as the record type and replace the crossed-out information with the IP address of your own server/website and your own domain name.

example dns spf

5 tips to still be found in Google

The first results in Google are paid advertisements.

Did you know that?

The consequence of this is that the site doesn’t necessarily have to be good… it just needs to pay enough to Google to appear at the top?!

Who bids more?

The highest bidder gets the top position in the first 3-4 search results.

AdWords – the program behind the paid search results – can even be set up to pay more per click to outbid your competitors.

On popular searches, websites end up paying 1-4 euros per click!

And who ends up paying that? (That’s rhetorical)

Still be found in Google

Let’s forget about AdWords for now!
We’re going to explore the possibilities of being found in Google without paying:

  1. Write articles with multiple specific keywords
    On popular keywords, you’ll first come across the advertisements.
    For example, “score in Google” shows advertisements…
    But “how to score in Google 2017” currently doesn’t show any advertisements.
    This way, you have a chance of being seen!
  2. Keep your website fast and secure
    A real killer in the search results is a website that phishes for bank details and other customer information (through malware).
    Similarly, a slow website. No one wants to visit a slow website where you have to wait 10 seconds per page.
    Google also pushes such websites to the back of the line (check here to see how fast your site is).
  3. Regular updates
    We’re not even talking about the plugins and WordPress itself.
    But about the content: texts, news.
    Google loves websites that regularly publish news. These websites get priority over others.
  4. Backlinks
    Here we go with those English terms again…
    Backlinks can also be called “references.”
    Backlinks are links on other websites that point to your website.
    Think of important, large websites rather than directories or forums.
  5. Patience
    If you want to be at the top of the search results without paying Google through AdWords, it will take longer to rank well.
    It’s a matter of patience and effort. Or… you could try a viral campaign!

What are your visitors looking for?

Discover what your visitors are searching for with Search Meter, the ideal WordPress plugin.

It often happens that you’re looking for a specific product or piece of information and end up on a website through Google where you can’t find what you’re looking for.

Many websites have a search bar that allows you to search within the website.

search within the website

But even then, you still can’t find what you’re looking for! You continue your search on Google and click away from the website.

As a website owner, you want to prevent your visitors from leaving without finding the right information. But to do that, you need to know what they were looking for and whether they could find it!

That’s where this free WordPress plugin, Search Meter, comes in.

Search Meter is a brilliant plugin that does the following:

  1. Search Meter shows you the words visitors entered in your search bar.
  2. Search Meter collects the search terms from the past week, month, and more.
  3. Search Meter shows you how many results the search queries yielded.

WordPress search

The great value of Search Meter for WordPress

You quickly see what your visitors are searching for and whether you have pages or posts that discuss those topics. This way, you can provide the information they are looking for and retain your visitors!

The plugin is easy to activate and will work through your regular WordPress search bar. No complicated programming, just a few mouse clicks.

Convenience at its best!

Download this free plugin.

Or simply search and activate it through your plugin menu in WordPress

installing WordPress plugin

Turning off comments in WordPress

Are you tired of those comments too? They are often written in English and advertise products you will never buy!

Even if you have disabled comments on your WordPress website, the comments still appear in your admin area 🙁
Even when there are no comment forms on your pages and posts.

Follow these 4 steps and never see the comments again:

  1. Go to Plugins » Add New in your WordPress admin
  2. Type disable comments in the search bar
  3. Click on Install, and then on Activate
    reacties verwijderen


Don’t forget step 4!

Now that the plugin is active, you need to configure it under Settings » Disable comments.

You can choose to disable comments everywhere or specifically for each page or post.
reacties uitzetten wordpress

If you don’t want to see any comment notifications anymore, click on “everywhere.”

Yes! All those comment notifications are gone

That saves you from having to delete unwanted comments daily 😉

Did you find this tip helpful?! Many people with a WordPress website face this issue, so share this tip with your friends to help them get rid of it too!

Converting WordPress to Https

An SSL certificate is usually provided by your web host. After that, they leave it up to you or a professional to make the necessary changes to your WordPress website.

If you’re certain that your HTTPS certificate is enabled by your web host, you can proceed with setting up WordPress.

Does your website have a certificate?

Test your certificate by entering your website address with https://
If you see the following, your website doesn’t have a certificate:
no certificate

If you see a green lock icon or a green bar in your browser, then you have a certificate.
valid certificate

Preparing WordPress for HTTPS

The easy way

Go to Settings » General in your admin panel.
Change http to https.
(Don’t forget to save.)

wordpress https
If you can no longer access this address because your .htaccess file or your web host has already redirected your website to HTTPS, you can make this adjustment via PhpMyAdmin. This is a program that runs on your server and is provided by most web hosts.

Changing to HTTPS via the Database

This requires some additional login information.
You can find the username and password for your database in your WP-config.php file (via FTP on the server).

You also need an address for the PhpMyAdmin program (usually accessible through your hosting panel or in Plesk/Directadmin).

Once you’re in the database, go to: wp-options and update the URLs for siteurl & home (See the image below, but of course with your own addresses!)

mysql wordpress database

If you’ve done this correctly, you can log back into WordPress, and your website will be accessible via HTTPS!

Are your images and some pages not visible?

In that case, not all links have been updated, and you can use the Better Search & Replace plugin to do so.

Find it too complicated to switch WordPress to HTTPS?

The above steps can be complicated if you don’t have experience with FTP or PhpMyAdmin.
You can send us an email with your Directadmin or hosting details, and we will set up HTTPS for your WordPress website!

When I set up a website . for myself, it goes like this!

I have been programming, maintaining, and securing WordPress business websites since 2007, 5 days a week.
Even 7 days a week at times. But with great pleasure, busyness, and sometimes the overwork that you can expect from an entrepreneur.
As a result, my knowledge and experience with themes & plugins, as well as WordPress itself, are quite extensive and growing every day.

Because I am frequently asked what I would do with various aspects of a website, I will tell you:

How I create a new WordPress website
For myself!

Please note that I already have all the resources such as Notepad++, SmartFTP, hosting, Photoshop, various licenses, themes, and (premium) plugins. Approximately 50% of what I use is open-source, but other essential programs I use come at a cost.

  1. I always start with a fresh WordPress release.
    Directly the version with the Dutch translation.
  2. Then, I delete the Readme.html & License.txt files since they only reveal which WordPress release it is.
    That’s only useful for hackers.
  3. I register a domain name with Reviced.
    I also have 40+ domain names lying around, and sometimes I pick one up spontaneously.
  4. I create a new domain/data space on the server.
    I do this on a CentOS server with Nginx and PHP7 + Directadmin.
  5. Then, I choose a theme, which varies depending on the purpose it needs to serve.
    Sometimes I work with a blank theme. These are a few WordPress files with the raw basics without any other clutter. I style them from scratch using CSS, Photoshop, and custom code.
    There are times when I work with a “premium” theme. They can cost upwards of 50 euros, but sometimes they are just so beautiful 🙂 Until I want to make a customization… then I get tangled up in the spaghetti code they put in those themes 🙁
    And every now and then, I use a theme from ElegantThemes. I’ve had a Developer subscription with them for about 8 years, which allows me to use their themes unlimitedly.
  6. Next, I download and install plugins like Contact Form 7 (Contact forms), Count per Day (Visitor counter), and sometimes Visual Composer (Advanced editor).
    I also use the Advanced Custom Fields (for posts with extra info fields) and WPML (for multilingual sites) on 5 websites of mine.
  7. Then, I start creating the pages. These are usually the Home, News, Contact pages.
  8. I set the Permalink structure correctly and make the “Home” page as the front page (admin » settings » reading).
  9. After that, I activate the WPbeveiligen Antivirus plugin and configure it.
    This is not advertising, but rather a standard practice for the past 3 years. I don’t want hackers or unexpected issues on my site.
  10. I forgot to mention the automatic backup plugin Updraftplus, which I have been using since 2016. I activate it (I have UpdraftPlus make a backup) once I have set up most things properly. There is a free version that already offers many features, but I personally use the premium version.
  11. Then, I start putting my ideas onto the pages. The texts with a few images.
    I purchase images from 123rf.com, and sometimes I download them from free stock sites like Freeimages.com (formerly SXC.hu) and Pexels.
  12. For many sites, I also install a version of Yoast for Google. This is because I like to control which description Google displays. And to remove the /category/ slug from topics.

That’s roughly how I set up a site for myself!

In my opinion, anyone with this basic knowledge can create a good WordPress website. Don’t you think so?
Share your opinion on social media or here in the comments.
I would love to hear if you succeeded!


This is normal! They are trying to hack my WordPress!

The surprise remains great when we mention that there are daily attempts to hack a customer’s WordPress website.

My website? Out of all the websites out there?

We will try to explain it as simply as possible without getting into too technical details.
(Most of our blogs go into such detail that even hardcore programmers can’t follow anymore)

They are trying to hack your website!
This is logical because:

  1. Tens of thousands of scripts are active day and night on hackers’ computers and infected websites.
    These scripts have one purpose: to search for WordPress files/websites through Google and then perform a standard number of requests (hack attempts).
  2. If your website is discoverable on Google, then a Hackbot will find it too!
    A computer can perform millions of calculations per minute, so imagine the reach of such a Hackbot.
  3. The scripts are ingeniously crafted by former programmers.
    The scripts executed by the Hackbot are highly sophisticated.
  4. All plugins you use leave traces in the source code of your website, which provides a foothold for a Hackbot.
  5. There is a lot of money to be made by hacking WordPress websites.
    They can inject advertisements on your website.
    They can engage in link building through your website to boost their own website’s ranking on Google.
    They can change your payment details on WooCommerce to their own. (PayPal)
  6. WordPress is Open Source and available for free download, along with thousands of free plugins.
    They can thoroughly examine those plugins and search for vulnerabilities.
  7. Currently, 40% of all WordPress sites do not have an antivirus plugin.
    It’s only with an Antivirus plugin that you can see how many hack attempts are made.
    You can also see how many false attempts are blocked.
  8. Criminal activity is significant, very significant. Especially online, as the perpetrators can remain “anonymous”.

Every website that can be found on Google is simply facing attempts to break in. Files and URLs are being tested.

Think of it like a criminal checking if your backdoor is open.

At the time of writing, we have over 200 articles, many of which cover methods to prevent hackers from gaining access.

Do you want to secure your website?

We ensure that your website does not allow unwanted visitors (hackers and hackbots). They are registered, blocked, and cannot execute their scripts on your website!

We offer a comprehensive service/maintenance package so that you no longer have to worry about your website!

Click here if you want to leave the maintenance and security of your website to WPbeveiligen.


Insecure plugins in WordPress cause problems

How can a plugin become insecure?

  1. When it hasn’t been updated by the developer for more than 2 years.
    bijwerken plugin
  2. If the developer doesn’t have proper training and simply copies code from the internet to create a plugin.
  3. If input fields and search fields are not properly protected against injections.

The problems caused by insecure plugins

As mentioned in point 3, insecure plugins can be used to perform database injections. The database contains all your pages, news posts, and yes: the users and administrators of your website.
If there is access to the database, anything is possible, and the website is completely in the hands of the hacker.
Not only that, but the injections and modifications are done automatically by computers. Rapidly and with thousands of websites per day.

An insecure plugin is a ticking time bomb for your website.

How can you check if a plugin is secure?

  1. The website WPvulndb.com collects information about many plugins that have been known to have vulnerabilities. Check if your plugin is listed there.
  2. Check if your website has been injected using the Sucuri Malware Scanner.
  3. Use WPscan on Linux. This is quite complex, but if you have a highly important website, it is a step you should take to ensure security.

Finally

Try to use as few plugins as possible. Every plugin is a potential door for hackers and scripts that are eager to place links to their own website on yours.


Managing CronJobs in WordPress

What a Cronjob is according to Wikipedia: A Cronjob or crontab is a Unix command that executes a program or script at a scheduled time. Cronjobs are used in Unix-like systems such as Linux, BSD, and Apple Macintosh. The word ‘cron’ comes from the English word chronograph, which is a type of stopwatch.

What Cronjobs Do in WordPress

Cronjobs are used to periodically check for updates. Many plugins also use Cronjobs to perform tasks such as updating and removing information. You cannot simply disable the Cronjob function in WordPress.

Some plugins that work with Cronjobs:

  1. WooCommerce – for storing and removing user data. Viewed products are stored or removed after a certain period of time.
  2. UpdraftPlus – for creating periodic backups
  3. Yoast SEO – for fetching link suggestions for posts and pages

In short, every website has some Cronjobs running in the background.

Want to know which Cronjobs are active?

Viewing and Managing Cronjobs in WordPress

The WP Crontrol plugin allows you to see the active Cronjobs in your WordPress website.

You can view active Cronjobs and update or delete them.
After installing the plugin, you can find it in your Admin » Tools » Cron Events.

cron events

Cronjobs and Hackers

Hackers can use Cronjobs to perform certain tasks periodically.
That’s why it’s important to see which Cronjobs are active!

Consider the following malicious Cronjobs, for example:

  1. A Cronjob that registers an administrator account.
    If such a Cronjob runs every hour, you can delete whatever you want, but hackers will still find their way in.
  2. A Cronjob that deletes your logs.
    This allows a hacker to operate without leaving any traces.
  3. A Cronjob that deletes accounts.
    If your account is deleted, you won’t be able to manage the website, and the hacker will have control over it.
  4. A Cronjob that regenerates your password.
    It’s incredibly frustrating to receive a new password every time. You can do a reset, but having to do it every hour is not ideal.
  5. Cronjobs for forwarding data.
    If a task is set up to forward your and your users’ information every 5 minutes, a hacker will know about an order or website change faster than you do!


Finding WordPress hackers through server logs

Imagine your WordPress website has been hacked, but you don’t have any security plugins running. Or worse, the hacker has disabled the security plugin.
Then you have no idea what has happened, you don’t know which files have been modified, how the hacker gained entry…

Finding Server Logs in DirectAdmin

Server logs record EVERYTHING. However, they are in raw server language without any formatting. In DirectAdmin, you can find the server logs by logging in and navigating to Your Account » Site Summary / Statistics / Logs » Full usage log.
weblog

weblog

Understanding Server Logs

A lot of information will be presented to you.
There is a specific order in which we will guide you through the logs, so you can understand them.

server logs

  1. First, you will see the IP address.
    This points to the computer/router of the potential hacker.
  2. Next, you will see the date.
    Keep in mind that the server time may differ from your local time.
  3. Then, you will see a GET or POST command.
    This is important because a hacker or script will typically execute POST commands on your server/website.
  4. After that, you will see the requested URL.
    Here, you should see regular pages and information that a visitor can request.
    If you see URLs such as XML-RPC.php and other files on the server, you can assume that it’s not a regular visitor.
  5. Finally, you will see the User Agent.
    This refers to the browser/operating system being used.

Now that you can read the server logs, you can investigate the history of your website and the actions of the hacker.
Here, we use the term “hacker,” but in 9 out of 10 cases, it refers to a script executed by the hacker or even an automated script that the hacker no longer pays attention to. They only look at the outcomes and results.

Finding the Hack(er)

A server log can easily contain 2000 lines, and you may only have the logs for the last 24 hours.
(We assume that you have discovered the hack on time or that it is a recurring hack.)

What to look for:

You will search for specific keywords, which can be done by opening the log file in your browser or using your favorite text editor.

  1. POST – As mentioned earlier, a hacker or script executes a command on your website to achieve something.
  2. XML-RPC and other PHP files – A visitor opens pages and posts, NOT PHP files.
  3. IP addresses from strange countries – If you have visitors from China, Russia, Germany, France, etc., while your website is targeted at a Dutch audience, and they access a large number of pages and/or files, it is highly suspicious. Use the IP Location finder to determine the country of origin for a user.

As a programmer, you can do this using Notepad++ or any other code editor that allows you to highlight lines directly.

Knowledge is Power, but not Victory Yet

Now that you can read the logs, have found the hacker, and know which actions they have taken, you can start undoing the consequences of the hack.

In many cases, the hacker has placed files or inserted text ads. These can be removed or reversed by restoring a backup.

But! You’re not done yet

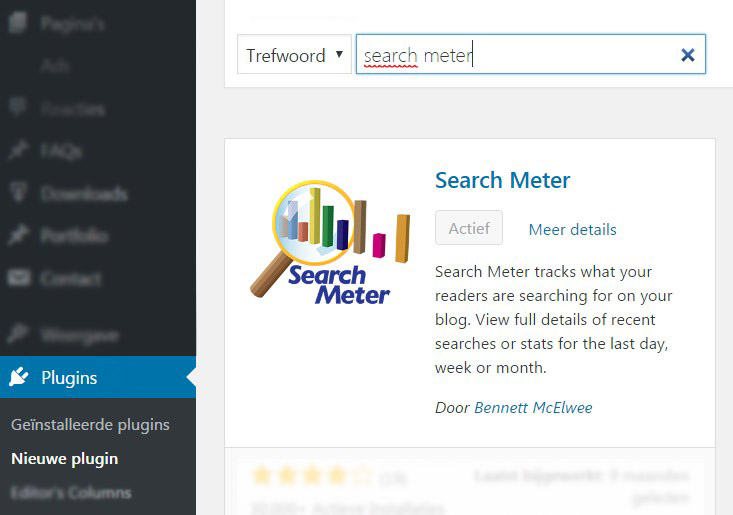
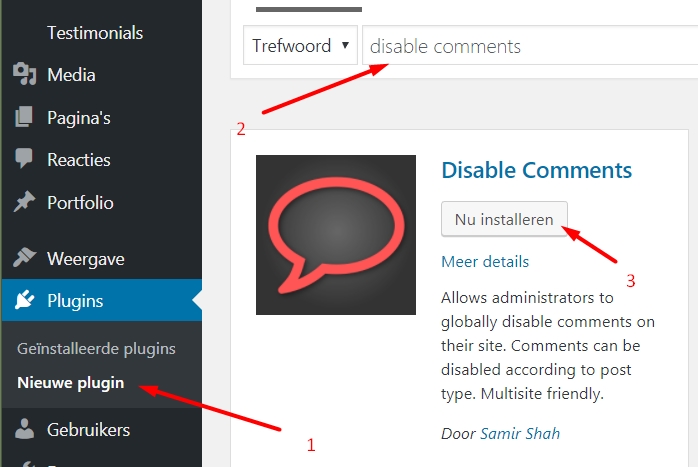
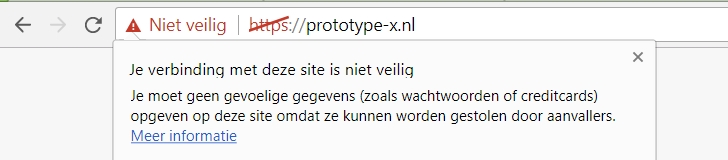
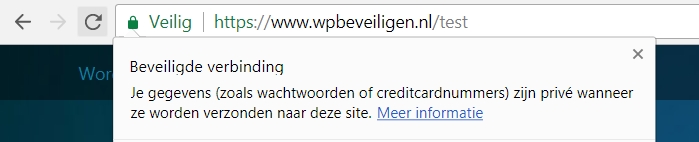
The hacker has gained entry, whether manually or through a script, and it will happen again unless you secure your website with a WordPress Antivirus plugin.

Configure the plugin properly and follow all the necessary steps to make your WordPress site secure and hacker-proof!

And as always, back upback up, and back up some more backups!